Sears Kenmore 1753 158.1753 Sewing Machine and accessories
Sears Kenmore 158.17530 Sewing Machine model 1753, is my TOP FAVORITE sewing machine, if I could only have one, due to the simplicity of the design, and function, making it super simple to maintain, and use. It is all metal mechanical parts, I prefer it in a table, with the lift assist spring, for ease of use. The 1755 is a very close 2nd, they are nearly identical (click on alphabetical post index, at top of page, then click on the Kenmore 1755 post, to see more about the similarities). 1.5 amp motor, dual belt pulley system.
Center homing needle, low shank feet, easy to find walking foot (even feed foot), ruffler, roller feet, snap on feet, quilter's 1/4" foot, edgestitch foot, stitch in the ditch, without needing to spend very much.
Monogrammer and buttonholer for 1703 & 1803 appears to use same plate system, but they have different measurements, so you cannot use those monogrammers and buttonholers on the 1753. There are at least 3 different sizes of plate systems, which Kenmore used, which appear the same, but are actually are slightly different measurements, so you do need to double check the measurements on both the sides, and the slightly offset end of the coverplates, before purchasing them second hand, to ensure they will fit your Kenmore.
The various manufacturers did not always put part numbers on most Sears Kenmore sewing machine parts and accessories, or even on their organizer trays and "books", so unless the monogrammer instructions are still with the accessories, or the original manual is with them, it is often impossible to tell which specific Kenmore machine an accessory set is for, without either measuring carefully (use metric system, for accuracy, since that is what they were manufactured with), or without the seller knowing for sure which machine each set of accessories are for.
CAM STITCHES NOT WORKING RIGHT- REPAIR INFO & VIDEO-
If your Kenmore 1753 isn't stitching the stretch stitches, or the pretty decorative cam stitches properly, even when you set the machine correctly, your stitch regulator is probably frozen. The knob on the back of the machine may turn, and look like it is functional, but if it doesn't actually change the stitches, the rod going through the back wall of the machine is frozen up with dried sticky oil.
The rod does not have an actual flat spot, to tighten the grub screw on the dial for this stitch regulator, which is why the dial will still turn, when the rod is frozen. It is a simple fix, just dip your Qtips in rubbing alcohol or kerosene, and clean this rod, then oil it. (You don't have to remove the rod from the machine to do this, just clean both sides of the rod, where it goes through the back wall of the machine, oil it, turn the rod back and forth gently - it won't turn too far, it shouldn't - clean it again, then oil it again.)
I loosened the grub screw, and removed the knob before cleaning the rod, then put the knob back on, and tightened the grub screw, to test whether I had it loosened enough. (If you decide to use a pair of pliers or lock grips to try to turn the rod before replacing the knob, protect the rod with rubber, or a towel, or something to protect it from being damaged by the grippers on your pliers.)
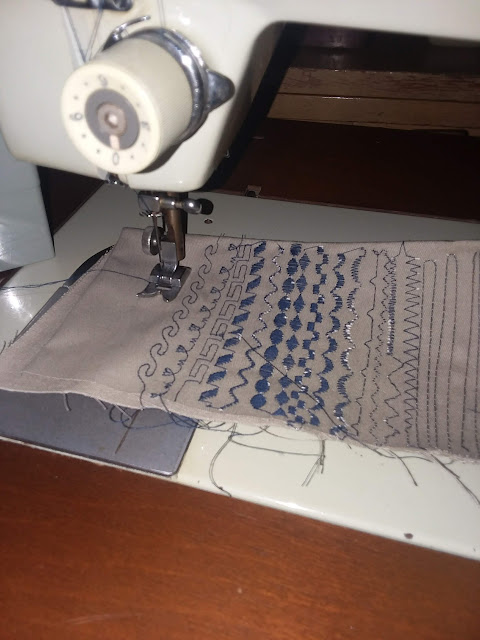
Built in zigzag, blind hem, and multistitch zigzag stitches, but can use ALL the Kenmore C stitch cams, if you like more stitch capability!
The Japanese Sears Kenmore sewing machines manufactured by Maruzen Jaguar, are easily identified, by their manufacturer identification number, 158 to the left of the decimal, on the metal nomenclature plate attached to each sewing machine. The earlier models still have cast iron bodies, which is why you are best off, having them installed in a sturdy table, or, at the least, a sturdy carry case. The mechanical workings are mostly steel, and even the dials and decorative details have much thicker metal plating on them, than later models.
1753 is a very smooth running sewing machine, which, if properly cleaned, oiled, and maintained, will outlast several generations.
Built in stitches (steel cams) include blind hem, zigzag, and multi stitch zigzag, also known as the mending stitch.
Chainstitch capable (with the correct accessories, same for 1753 and 1755).
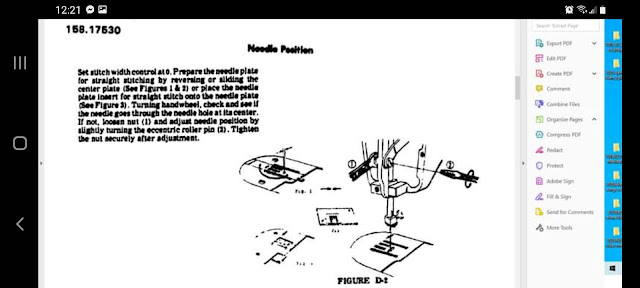
Kenmore model 1753 is a twin needle capable zigzag machine, which came with an ingenious reversible needleplate insert, to change the needleplate from a zigzag needleplate, to a straight stitch needleplate, in a few seconds, simply by turning the narrow needleplate insert, around!
Details
Cast Iron body & handwheel, metal mechanical parts
Dual belt system (Heavier duty bushing than newer Kenmore's for dual belt system, remember to oil bushing/bearing between belts for smooth, quiet sewing)
1.2 Amp powerful motor hidden in base of machine
Manual
ACCESSORY CASE- 2 layer sage green plastic organizer
Buttonholer "hands free" flat geared all metal buttonholer system & 9 cams in tray
9 satin stitch cams
4 stretch & decorative reverse stitch cams
Twin Needle Capable
Chainstitch needleplate insert, and bobbin insert adapter, creates quickly removable, temporary stitching, or permanent decorative stitches.

Center homing needle
Kenmore model 1753 is a twin needle capable zigzag machine, which came with an ingenious reversible needleplate insert, to change the needleplate from a zigzag needleplate, to a straight stitch needleplate, in a few seconds, simply by turning the narrow needleplate insert, around!
Details
Cast Iron body & handwheel, metal mechanical parts
Dual belt system (Heavier duty bushing than newer Kenmore's for dual belt system, remember to oil bushing/bearing between belts for smooth, quiet sewing)
1.2 Amp powerful motor hidden in base of machine
Manual
ACCESSORY CASE- 2 layer sage green plastic organizer
Buttonholer "hands free" flat geared all metal buttonholer system & 9 cams in tray
9 satin stitch cams
4 stretch & decorative reverse stitch cams
Twin Needle Capable
Chainstitch needleplate insert, and bobbin insert adapter, creates quickly removable, temporary stitching, or permanent decorative stitches.

Center homing needle
Low shank feet (easy to find extra feet, if desired, including walking foot, ruffler)
Reversible needleplate insert quick changes from zigzag to straight stitch
2 sage green screwdrivers, large, small
needle threader
Pack of needles, includes a twin needle
Class 15 bobbins
2 silicone washers to use on spool pins
Low shank feet
Zigzag foot
Straight stitch foot (center homing straight stitch machine)
Satin stitch zigzag foot
Zipper/cording foot, adjustable, invisible zipper type
Flat style Buttonholer is all metal
Monogrammer and buttonholer for 1703 & 1803 appears to use same plate system, but they have different measurements, so you cannot use those monogrammers and buttonholers on the 1753. There are at least 3 different sizes of plate systems, which Kenmore used, which appear the same, but are actually are slightly different measurements, so you do need to double check the measurements on both the sides, and the slightly offset end of the coverplates, before purchasing them second hand, to ensure they will fit your Kenmore.
The various manufacturers did not always put part numbers on most Sears Kenmore sewing machine parts and accessories, or even on their organizer trays and "books", so unless the monogrammer instructions are still with the accessories, or the original manual is with them, it is often impossible to tell which specific Kenmore machine an accessory set is for, without either measuring carefully (use metric system, for accuracy, since that is what they were manufactured with), or without the seller knowing for sure which machine each set of accessories are for.
FROZEN FEED DOGS QUICK RELEASE VIDEO TIP
Old sewing machines tend to freeze up from the sewing machine oil drying up, until it is a lacquer, or glue, literally gluing the parts together. The feed dogs are one of the many parts affected by this, so if your feed dog lever, or button won't work, or release the feed dogs, this is the quick easy way to expedite freeing them up.
Lay a flathead screwdriver across the tip of the feed dog "bullet", or "plunger", then use a rubber mallet, (NOT sledgehammer, like I accidentally said at first, in the video, lol!) to gently tap the shaft of the screwdriver, towards the handwheel. If done right, it should break the hold of the old oil, allowing you to pull the plunger out of the tube, so you can use your Qtips dipped in rubbing alcohol, or odorless kerosene, to use as a solvent, to clean off the old oil on both the plunger, and the inside of the tube. usually, this will allow the feed dog lever or button to work again, also, though you may need to clean and oil the underside of the lever or button mechanism and linkages, also, to get it all working properly, and easily.
CAM STITCHES NOT WORKING RIGHT- REPAIR INFO & VIDEO-
The rod does not have an actual flat spot, to tighten the grub screw on the dial for this stitch regulator, which is why the dial will still turn, when the rod is frozen. It is a simple fix, just dip your Qtips in rubbing alcohol or kerosene, and clean this rod, then oil it. (You don't have to remove the rod from the machine to do this, just clean both sides of the rod, where it goes through the back wall of the machine, oil it, turn the rod back and forth gently - it won't turn too far, it shouldn't - clean it again, then oil it again.)
I loosened the grub screw, and removed the knob before cleaning the rod, then put the knob back on, and tightened the grub screw, to test whether I had it loosened enough. (If you decide to use a pair of pliers or lock grips to try to turn the rod before replacing the knob, protect the rod with rubber, or a towel, or something to protect it from being damaged by the grippers on your pliers.)
To see more in depth information on Kenmore's with this issue check this other blog post with links to several of my videos on this issue-
Kenmore stretch stitch regulator fix
For a great way to look up Kenmore sewing Machine Models and Accessories, David Goboff, created this wonderful Kenmore Model Chart to share with others online-
https://docs.google.com/spreadsheets/d/13fGnnr7oYXjzC1OQRsq2AaNGUUmtqNbC9BfyAOpxdFo/edit?fbclid=IwAR1m3f5VcCye3cTdDDL86Rxz_3Tt1FF07di0dDdaObytCmAKSwgL-6_UiKk#gid=0
 |
| 1753 parts illustration |
 |
| 1753 parts list |
 |
| 1753 Needleplate insert Polish burrs with superfine sandpaper or dremel, to prevent thread and fabric strikes |
 |
| 45 lbs. Of STRONG, HEAVY sewing machine! |
 |
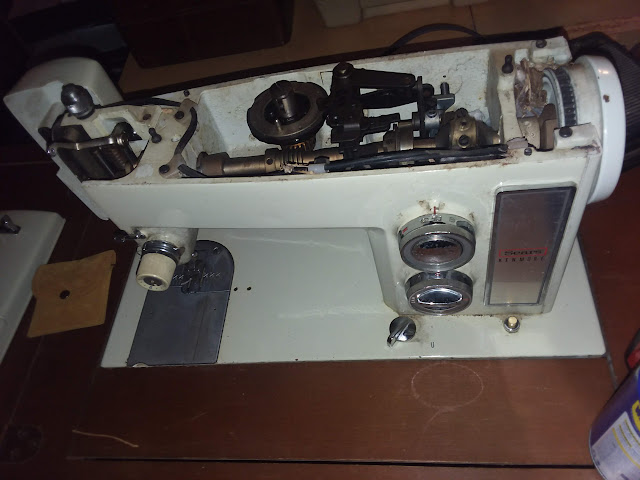
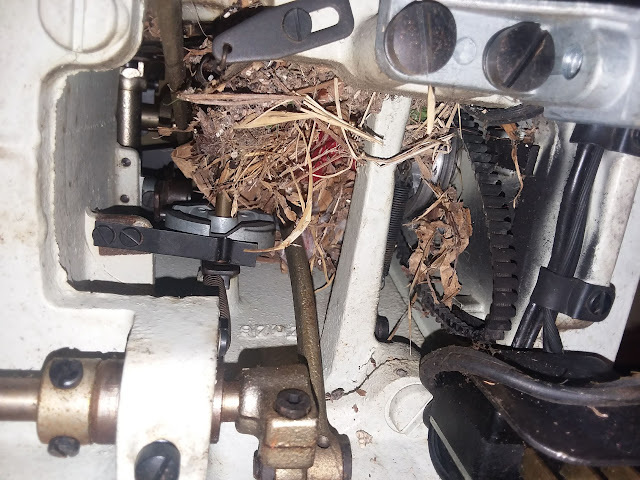
| Belt area was full of mouse nest. Be sure to clean and oil dual belt pulley bearing |
 |
| Cam door opens to the back |
 |
| Stitch length piston purple Pivoting stitch length reverse cam follower Clean and oil both sides |


